
Last updated October 30, 2026
 Architectural shingles
 Metal roofing
 Tile roofing
 GAF
 Owens Corning
 Flat & low-slope
Free roof inspection with deck photos before we talk money - GAF and Owens Corning certified installation
Roof Repair Maintenance Checklist for Ontario Homeowners
A roof that passed its fall inspection in September can be significantly damaged by a single Santa Ana wind event in October, yet most maintenance checklists won’t have you look again until spring. That gap between calendar-based advice and Ontario’s actual weather patterns is where small problems become expensive failures. This guide replaces arbitrary seasonal scheduling with condition-triggered thresholds: specific visual cues that tell you exactly when to act, what to document, and when to call a professional. You’ll learn what our inspectors look for after wind events, which attic warning signs most homeowners miss, and how to keep a documentation log that protects your insurance claim. If you own a home in Ontario, this is the checklist that matches how our roofs actually fail.
Styles & brands we work with
Quick Answer
A roof maintenance checklist for Ontario homeowners should be condition-triggered, not calendar-based. After any Santa Ana wind event, rainstorm, or visible temperature spike in your attic, inspect for lifted or missing shingles, granule accumulation in gutters, cracked flashing, and daylight visible from the attic. Address any gap wider than 1/8 inch, any crack deeper than surface level, or any granule loss exposing the shingle mat immediately. Document everything with dated photos, and schedule a professional inspection at least once annually or after any major weather event.
Table of Contents
- The Santa Ana Problem: Why Ontario Roofs Fail Between Checklists
- Post-Wind-Event Inspection Protocol for Ontario Homes
- Visual Thresholds: When “Monitor” Becomes “Repair Now”
- Flat vs. Pitched Roofs: Two Different Checklists for Ontario’s Housing Mix
- Attic Indicators: The Interior Checklist That Catches Exterior Problems Early
- The Documentation Log: Your Insurance Claim Starts Before the Damage
- Common Mistakes to Avoid
- When to Call a Professional
- Frequently Asked Questions
- The Bottom Line
The Santa Ana Problem: Why Ontario Roofs Fail Between Checklists
Ontario sits directly in the path of Santa Ana wind corridors that funnel through the Cajon Pass and race across the Inland Empire. These winds routinely hit 40-60 mph, with gusts exceeding 70 mph in exposed neighborhoods near the foothills. A typical asphalt shingle roof is rated for wind uplift resistance, but that rating assumes fasteners are intact, sealant strips are still bonding, and no prior damage has weakened the system. In our experience working on Ontario roofs, the homes that suffer catastrophic leaks after Santa Ana events are rarely the ones with obvious pre-existing problems. They are the ones where a single shingle tab lifted six weeks earlier, the wind found the gap, and a 12-square-foot section peeled away overnight.
Most maintenance advice comes from national publications written for climates with predictable seasons. Ontario does not have a predictable season. We get 90-degree heat in November, wind events in October and December, and rain that arrives in concentrated bursts rather than gentle soaking. A calendar-based checklist that says “inspect in spring and fall” might mean checking in March and September, which leaves October through February completely uncovered despite that being the highest-risk window for wind damage and the start of our rainy season. Condition-triggered maintenance, the approach we use on every Roof Inspection in Ontario we perform for clients, means the roof gets checked when conditions change, not when the calendar says so. A 50-mph wind event, a hailstorm in Rancho Cucamonga, a week of 100-degree heat in October, all of these are triggers for a focused inspection, regardless of what month it is.
Post-Wind-Event Inspection Protocol for Santa Ana Conditions
When Santa Ana winds rip through Ontario, damage concentrates in predictable locations. Wind accelerates as it moves up and over roof ridges, creating uplift forces that pull shingles upward. Corners and roof edges take the most abuse, especially on the windward side facing north and northeast where Santa Ana winds typically originate. Here is the exact protocol our inspectors follow after wind events, adapted for homeowners who want to do a preliminary ground-level assessment before deciding whether to call us.
- Start with the ground walk. Walk the full perimeter of your home and look for shingle tabs, pieces of flashing, or granules scattered in the yard and on walkways. Wind damage almost always leaves debris. If you find shingle pieces, photograph them where they lie before touching anything.
- Check the gutters. Look for granule accumulation. A thin dusting is normal wear. A pile of granules in one section of gutter indicates the shingles directly above that section are shedding at an accelerated rate. Wind-driven rain scours granules loose, and the gutters collect the evidence.
- Scan the ridge line. Ridge cap shingles take direct uplift force. Look for caps that are lifted, shifted, or missing. A ridge cap that’s loose by even half an inch gives wind a pry point, and the next event can unzip the entire ridge.
- Inspect corners and eaves. The corners of the roof, particularly on the north and northeast exposures, concentrate wind forces. Look for shingles that appear lifted at the edges, even slightly. From ground level, a lifted shingle often looks like a shadow or a slight color variation that doesn’t match the surrounding field.
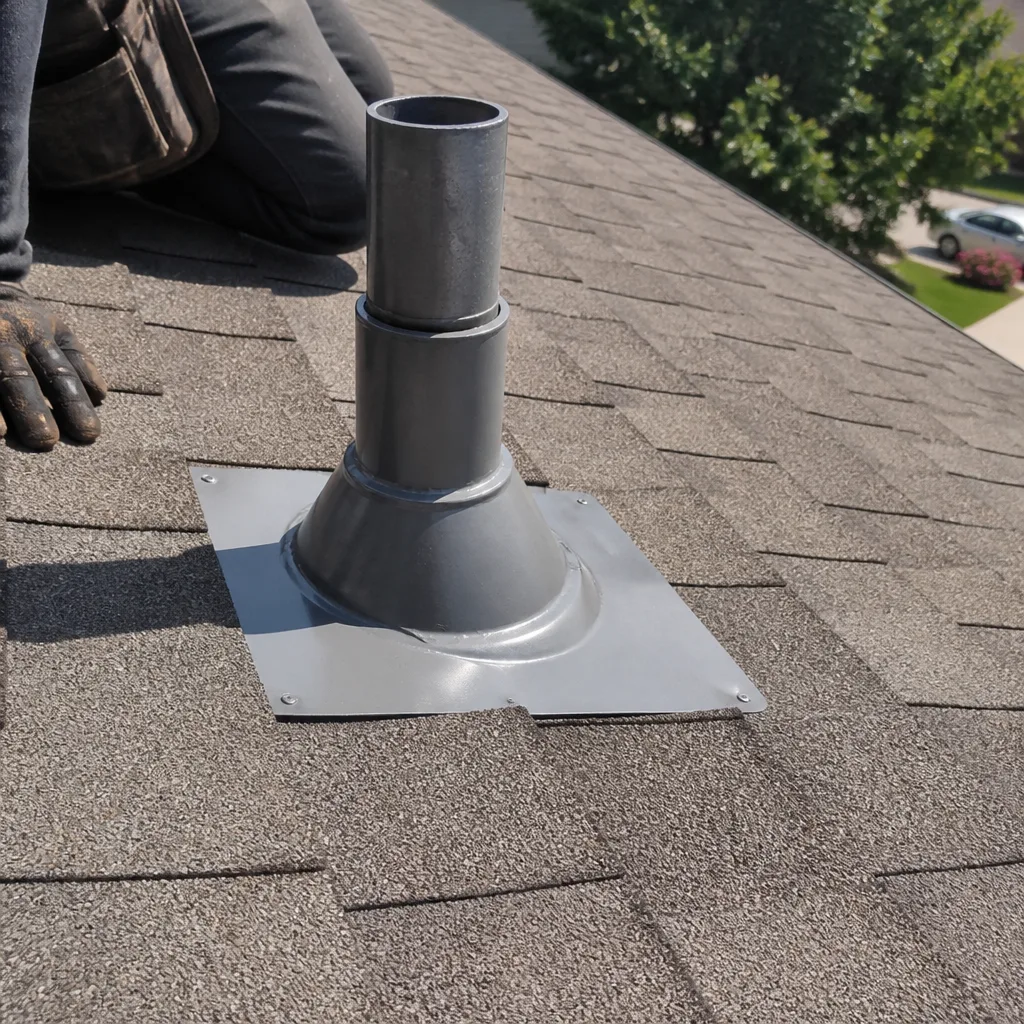
- Check flashings at penetrations. Vents, pipes, chimneys, and any roof penetration has metal flashing that can be bent or lifted by wind. Look for shiny metal edges that are suddenly visible where they weren’t before, or flashing that appears separated from the roof surface.
- Photograph everything from multiple angles. Your documentation log starts now, not after water finds its way inside. Photos taken on the day after a wind event carry far more weight with insurance adjusters than photos taken weeks later.
After any wind event with gusts above 40 mph, do this walk. It takes 15 minutes and catches most wind-related failures before rain turns a lifted shingle into a ceiling stain. For a deeper dive into how wind affects Ontario roofs specifically, our guide to Roof Repair in Ontario covers the repair side of what these inspections find.
Visual Thresholds: When “Monitor” Becomes “Repair Now”
Most homeowners have no idea what a problem looks like versus a minor blemish. They either ignore something that needs attention or panic over cosmetic wear. Here are the specific thresholds our inspectors use when we evaluate Ontario roofs. Each one crosses a clear line from “keep an eye on it” to “fix this before it spreads.”
Granule Loss: The Sandpaper Test
Shingle granules protect the asphalt layer from UV degradation. When granules wear off, the shingle ages rapidly. The threshold: if you can see the dark asphalt mat showing through the colored granule layer on more than 30% of any single shingle, or you can run your hand over the shingle and come away with granules covering your palm, that shingle has entered failure territory. A few granules in the gutter is normal. A shingle that looks patchy, with dark spots where granules used to be, is not. In Ontario’s UV-heavy climate, granule loss accelerates after year 12-15 on economy shingles and year 18-25 on premium lines.
Crack Width: The 1/8-Inch Rule
Hairline cracks in roofing materials (whether shingles, tile, or flashing) are usually cosmetic. But once a crack reaches 1/8 inch wide, it becomes a water entry point. Water doesn’t need a big opening. Surface tension pulls it into gaps as narrow as a human hair. An 1/8-inch crack in flashing or in a shingle’s surface means water has a path, and Ontario’s concentrated rain bursts will find it. Cracks smaller than 1/8 inch should be documented and rechecked quarterly. Cracks at or above 1/8 inch go on the repair list immediately.
Flashing Gap: The Wrinkle Test
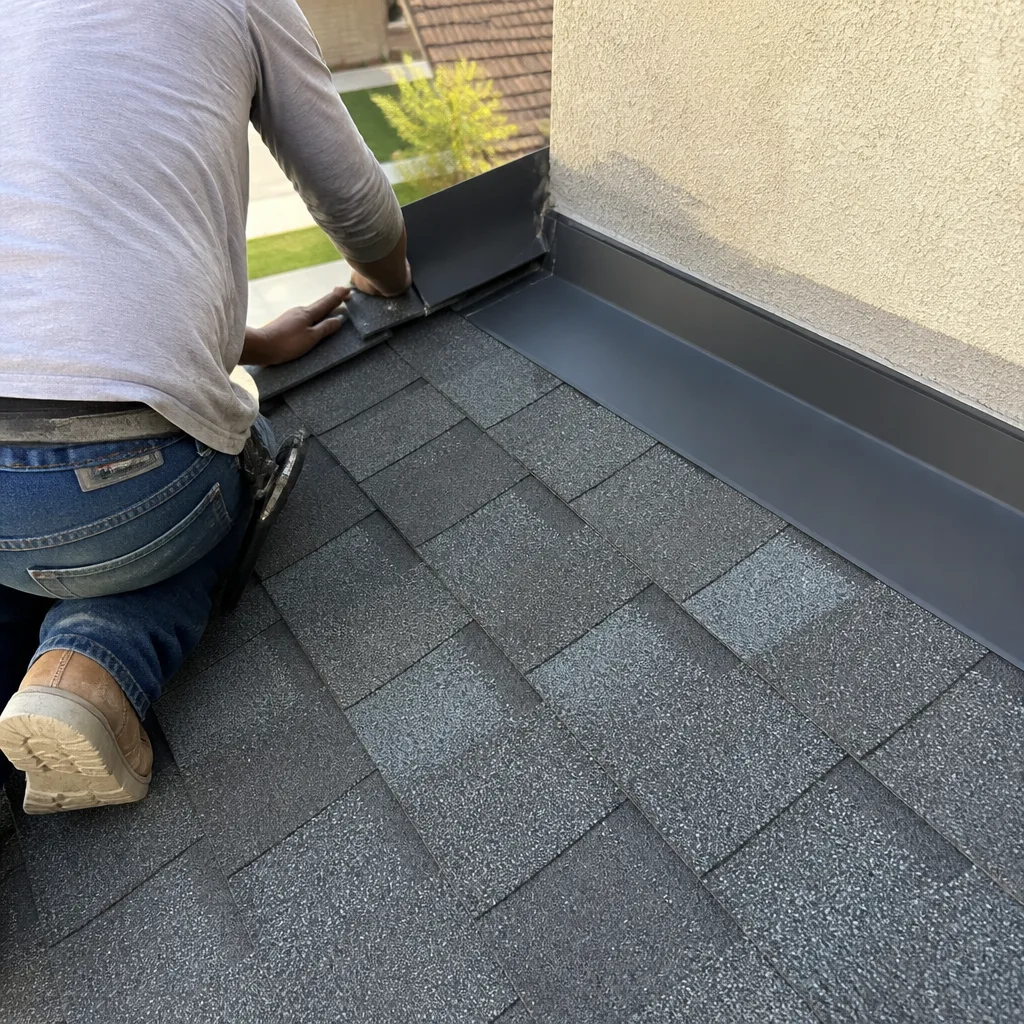
Flashing should sit flat against the roof surface and the vertical wall or penetration it seals. If you can see daylight between the flashing and the roof, if the flashing lifts when you press on it, or if there’s a visible gap where caulk or sealant has pulled away, that’s a water entry point. The threshold is simple: any visible gap at all in flashing is a repair item. Flashing is the most common leak source on Ontario homes, and gaps here fail fast.
Shingle Curling: The Quarter Test
Place a quarter, edge-up, next to a curled shingle edge. If the curl rises higher than the quarter’s thickness, the shingle has lost its ability to lay flat and seal. Curled shingles catch wind, and in Santa Ana conditions, one curled shingle becomes a section of missing shingles. Curling at the quarter height or beyond means replacement of those shingles, not re-sealing. Shingles that have curled this far have lost the structural integrity of their asphalt core and re-sealing them is a temporary cosmetic fix, not a repair.
Ceiling or Wall Staining: The 24-Hour Rule
No threshold here. Any new water stain on an interior ceiling or wall is a repair-now item, even if the stain is small and dry. Water that reaches your ceiling has already saturated insulation and potentially degraded drywall. By the time you see a stain, the leak has been active long enough to work through multiple material layers. Small stains often indicate a larger hidden problem. If you see a new stain, call for a professional inspection within 24 hours. The leak path needs to be found before the next rain.
Flat vs. Pitched Roofs: Two Different Checklists for Ontario’s Housing Mix
Ontario’s housing stock spans ranch-style homes with low-slope roofs, two-story traditional homes with steeper pitches, and everything in between. Each roof geometry fails differently, and a checklist written for one misses problems on the other. Here is how the maintenance list splits by roof type.
Pitched Roof Checklist (Ontario’s Two-Story and Traditional Homes)
- Check shingle seal integrity after wind events. Lift a shingle tab gently. It should resist and spring back. If it lifts freely with no resistance, the sealant strip has failed, and that shingle is a wind-uplift candidate.
- Inspect valleys for granule wear and cracking. Valleys concentrate water flow. Shingles in valleys wear faster than field shingles by a factor of two to three. Look for exposed mat, cracks along valley lines, and granule accumulation in gutters below valleys.
- Verify step flashing at sidewalls. Where the roof meets a vertical wall (common on two-story homes), step flashing should be tucked under siding and overlapping each shingle course. Gaps here are the single most common leak point on modern Ontario homes.
- Check gutter hanger points. Heavy debris loads pull gutters away from fascia, which breaks the drip edge seal and sends water behind the gutter. Look for visible gaps between gutter and fascia and for sagging sections.
- Look for nails backing out. Ontario’s temperature swings cause roof decking to expand and contract. Nails that were driven slightly shallow will work their way up, creating small bumps under shingles. These bumps eventually break through. Spot-nail any visible protrusion.
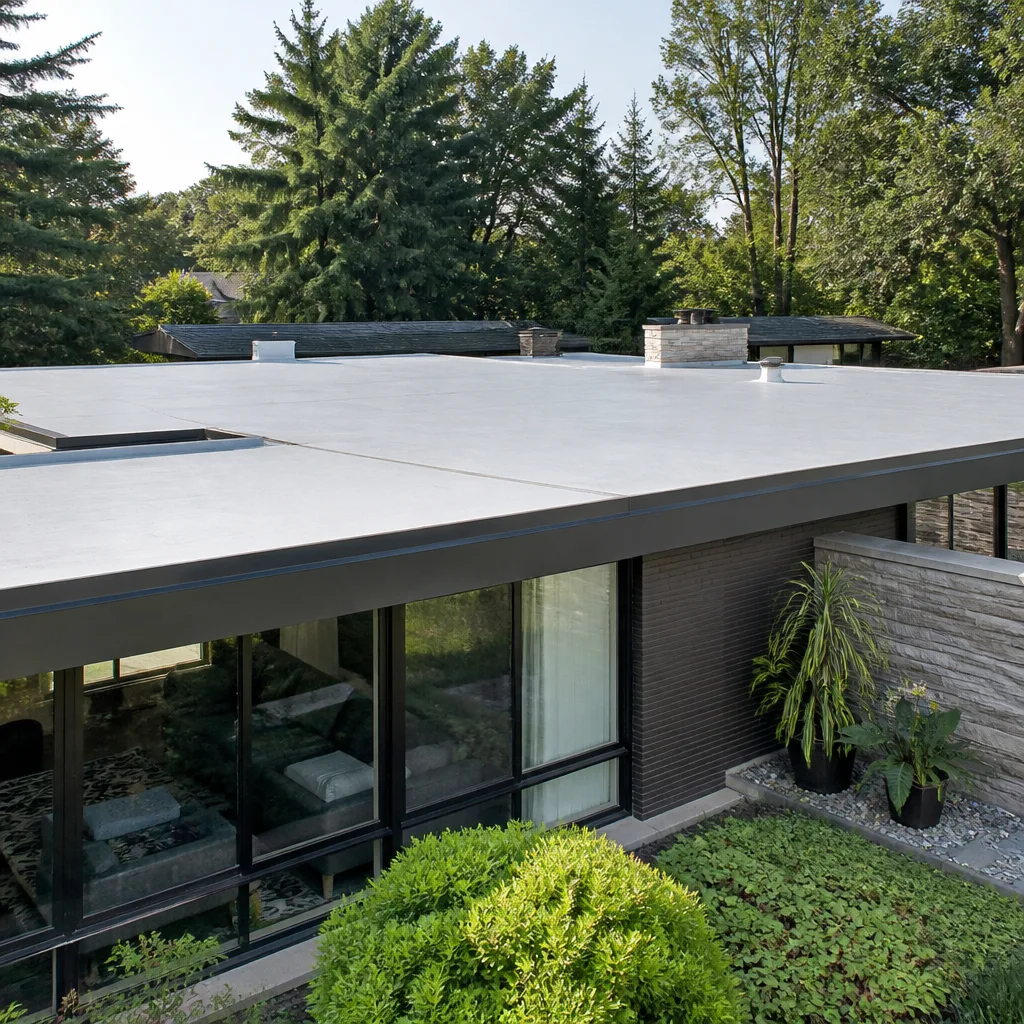
Flat or Low-Slope Roof Checklist (Ontario’s Ranch and Mid-Century Homes)
- Check for ponding water after rain. Standing water more than 48 hours after rain indicates improper slope or a sagging substrate. Ponding is not cosmetic. It degrades roofing membranes rapidly and becomes a breeding ground for leaks.
- Inspect seams and flashing at membrane edges. Flat roofs (common under rolled roofing, modified bitumen, or TPO, depending on what your original builder installed) fail first at seams and terminations. Look for lifting, bubbling, or visible separation at any seam.
- Check for blistering. Air and moisture trapped under the membrane create blisters when Ontario heat expands them. Blisters feel soft underfoot and eventually crack. Any blister larger than a half-dollar is a monitor item. Blisters larger than a dinner plate are repair items.
- Clear debris from drains and scuppers. Flat roofs depend on working drainage. A blocked drain turns a flat roof into a swimming pool. After any wind event, check that drains are clear and scuppers are flowing.
- Inspect edge metal for separation. The metal edge where the roof membrane terminates is a common failure point. Gaps between metal and membrane let wind lift the entire system.
Many Ontario ranch homes have a combination, a steep street-facing pitch that transitions to a flatter rear section. If that describes your home, both checklists apply, and you should inspect the transition point carefully. That’s where different materials and slopes meet, and it’s a chronic trouble spot. Whether you need Roof Replacement in Ontario or targeted repairs depends on what these inspections find and how much life is left in the overall system.
Attic Indicators: The Interior Checklist That Catches Exterior Problems Early
The most useful roof inspection happens inside your attic, not on top of your roof. The attic faces the underside of the decking, which is where leaks start long before they reach your ceiling. A homeowner who checks the attic quarterly catches problems months before a homeowner who only looks at the exterior. Here are the attic indicators that belong on every Ontario homeowner’s checklist.
Daylight Pinpoints
On a bright day, turn off the attic light and let your eyes adjust for two minutes. Look up at the decking. If you see pinpoints or slivers of daylight, you are looking at a hole in your roof system. Even a pinhole admits water during driving rain. Mark each one with a piece of tape or a photograph. These holes are often nail pops, small punctures from falling debris, or gaps at seams. Any visible daylight is a repair item, no exceptions.
Heat Spikes
Ontario summer temperatures routinely push attic temperatures above 140°F without proper ventilation. A well-ventilated attic should be within 10-15 degrees of outdoor temperature. If your attic feels dramatically hotter than outside on a warm day, or if your air conditioning runs constantly while upstairs rooms stay warm, your roof ventilation is failing. Heat kills shingles from the underside, accelerates granule loss, and shortens service life dramatically. For Ontario’s climate, a properly vented attic adds years to any roofing material.
Insulation Moisture
Reach into the insulation near the eaves and around any roof penetrations (chimney, plumbing vents). Insulation should feel dry and springy. Damp, matted, or compressed insulation indicates water intrusion, even if you haven’t seen a ceiling stain yet. In Ontario’s dry climate, insulation doesn’t get damp from humidity. It gets damp from a leak. Find where the moisture is entering before it spreads through the attic.
Rust on Nail Points
The underside of the decking shows the points of roofing nails. If those nail points show rust, moisture is present in the roof system. Rusted nail points are an early warning sign that leaks are active or condensation is forming. Either way, the roof system needs evaluation.
Staining on Decking
Water stains on the underside of the roof deck show the history of every leak your roof has ever had. New stains are dark, old stains are lighter with defined edges. If you see staining that you didn’t see in the last attic check, a new leak is active. Trace the stain upward along the decking slope to find the entry point. Stains tell a story. They narrow the search area from an entire roof to a specific section.
The Documentation Log: Your Insurance Claim Starts Before the Damage
Homeowners who keep a roof documentation log get better insurance outcomes. Not because insurance companies pay more to organized people, but because documentation changes what an adjuster can verify. If you file a claim after a Santa Ana event and can show dated photos of your roof from three months prior, with no damage visible, the adjuster has a baseline. Without that baseline, the claim becomes your word against the insurance company’s assumption of wear and tear. Here is the documentation system that works for Ontario homeowners.
What to Log After Every Inspection
- Date and time. Every entry starts with this. Insurance claims live or die on timeline clarity.
- Weather conditions during the inspection and since the last inspection. Note any wind events, hailstorms, temperature extremes, or heavy rain. Connect the condition of the roof to what the weather has done.
- Photos from the same angles every time. Establish four to six standard photo positions: front exposure, rear exposure, each side, the ridge, and any known trouble spots. Shooting the same angles every time makes changes obvious.
- Written observations. Two or three sentences on what you saw. “Ridge caps tight, no visible granule accumulation in front gutter, small crack in flashing at chimney noted and scheduled for closer inspection.” Specific and brief.
- Any maintenance performed. If you clear gutters, note it. If you apply sealant to a small gap, note the product, the date, and where. If you hire a roofer for any work, keep the invoice in the same file.
Why This Matters for Ontario Homeowners Specifically
Ontario experiences concentrated wind events followed by long dry periods. The damage from a Santa Ana event may not cause a leak until the first rain months later. Without a documentation log, an insurance adjuster sees a shingle that’s been missing for months and classifies the resulting water damage as neglect or deferred maintenance. With a log showing a documented inspection three weeks after the wind event, the same shingle becomes storm damage with a clear cause and timeline. The difference in claim outcomes is often tens of thousands of dollars. If you work with us for a Roof Inspection in Ontario, we provide a written report that becomes part of your documentation log, giving you a professional baseline that carries weight with adjusters.
Common Mistakes to Avoid
- Waiting for a leak to inspect. By the time water reaches your ceiling, it has saturated insulation, soaked drywall, and potentially damaged framing. The leak you see started weeks or months earlier. Inspection should happen before leaks appear, not after.
- Doing a ladder inspection without a spotter or proper setup. Ontario’s two-story homes mean roof edge inspections often happen from 15 to 25 feet up. A fall from that height is life-altering. Ground-level inspections with binoculars catch most issues, and a professional inspection is always safer than a DIY climb.
- Ignoring the attic because it’s uncomfortable. Attics in Ontario are hot, dusty, and cramped. They’re also the single best diagnostic tool you have for roof health. Ten minutes in the attic quarterly beats an hour on the ground looking up.
- Treating all granules in the gutter as normal. A light dusting of granules is normal wear. Accumulation that builds up in drifts at gutter joints indicates active granule shedding. The shingles above that gutter section are likely entering failure.
- Re-sealing curled shingles instead of replacing them. Once a shingle curls beyond a quarter-height, its asphalt core has degraded. Re-sealing is a temporary patch that fails in the next wind event, often taking adjacent shingles with it.
- Assuming a new roof means no maintenance. Every roof, even a brand-new one, needs inspection after major weather events. New roofs fail differently than old ones: installation errors, material defects, and settling all show up in the first two years. A new roof is not a maintenance-free roof.
- Filing an insurance claim without a documentation log. Without pre-damage photos and inspection records, your claim is weaker by default. The insurance company’s adjuster has professional records. You should too.
When to Call a Professional
Some roof issues are safe to monitor from the ground. Others cross a clear line where professional assessment is the responsible choice. Call a professional if you see any of these conditions: daylight visible from inside the attic, any interior water stain that’s new or growing, a shingle section missing after a wind event, flashing that has separated from the roof surface or wall, granules accumulating in drifts in your gutters, or any visible sag in the roof line when viewed from the street. These are not monitor items. They are active failures in progress. Hawk Roof Repair offers free estimates in Ontario, and our inspectors look at every slope, valley, and seam with the same hawk-eye detail we’d use on our own homes. Call (877) 731-1384 to schedule an inspection or discuss what you’re seeing.
Frequently Asked Questions
Inspect your roof after any wind event with gusts above 40 mph, after any hailstorm, after any rain event that produces runoff, and at least once every six months for a ground-level visual check. Ontario’s Santa Ana winds and concentrated rain patterns mean condition-based inspection frequency beats calendar-based scheduling. A roof that’s inspected after every significant weather event rarely develops surprises. Call (877) 731-1384 if your inspection turns up anything you’re unsure about, estimates are free.
Minor roof repairs in Ontario typically range from $350 to $900 depending on the scope, while larger repairs involving flashing replacement or section re-shingling commonly run $1,200 to $3,500. The final cost depends on the roofing material, the extent of damage, and the accessibility of the affected area. For an exact quote on your specific situation, call (877) 731-1384 and we’ll provide a written estimate.
Yes. We’re not locked into a single manufacturer, which means the material recommended for your home is chosen to match your roof’s existing aesthetic and your budget. Our team works with multiple leading material lines including GAF, CertainTeed, and Tamko, so the solution fits the home rather than the supplier relationship. That material flexibility is a core part of how we approach every Roof Repair in Ontario project.
Ground-level inspections with binoculars are safe and effective for most of what a homeowner needs to monitor: shingle condition, flashing gaps, ridge cap alignment, and gutter accumulation. Attic inspections are also safe and highly valuable. What’s not safe is climbing onto a roof without proper fall protection and training, especially on Ontario’s two-story homes where a fall carries serious risk. Leave ladder and rooftop work to professionals who work with safety equipment on every job.
A thorough professional roof inspection on an average Ontario home takes 45 to 90 minutes, including attic access, full perimeter walk, detailed photo documentation, and a written summary of findings. The time varies based on roof complexity, accessibility, and how many penetrations (vents, pipes, chimneys, skylights) need individual attention. A rushed inspection misses the small vulnerabilities that become expensive failures, which is why we treat inspection as a standalone service, not a courtesy add-on to a sales pitch.
Most Ontario homeowners’ insurance policies cover wind damage if you can document that the damage resulted from a specific wind event rather than gradual wear. Your documentation log is the deciding factor: dated photos before and after the event, weather records showing wind speeds on the date in question, and an inspection report from a qualified roofer all strengthen your claim. Contact your insurance agent first, then call us if you need a professional damage assessment for your claim.
Roof repair addresses isolated damage such as missing shingles, localized flashing failures, or small leaks, while roof replacement involves removing the existing roofing system down to the decking and installing a complete new system. The decision between them depends on the age of your roof, the extent of damage, and the condition of the underlying decking. A proper inspection determines which option serves your home better, which is why Roof Inspection in Ontario always comes first in our process.
The Bottom Line
Ontario rooftops face a combination of wind events and temperature swings that calendar-based maintenance schedules simply don’t account for. A condition-triggered approach, checking after every significant weather event, watching for visual thresholds that mark the line between monitoring and repairing, and keeping an attic-level and documentation-level record of your roof’s history, is the highest-leverage maintenance habit a homeowner can build. It costs nothing but attention, takes minutes per week, and catches the small vulnerabilities that become five-figure failures. The roof over your head is the single largest protective system your home has. Watch it the way a hawk would, and it will tell you exactly what it needs.
For help with any slope, valley, or seam on your Ontario roof, the team at Hawk Roof Repair offers free estimates and inspection-led recommendations. Call (877) 731-1384 to schedule yours. Explore our full range of services at the Hawk Roof Repair home page.
Written by the team at Hawk Roof Repair, serving Ontario since 2017.
See the difference
 Before
 After
 Before
 After
 Before
 After